Keeping still for research purposes: collecting MRI data in developmental samples

By: Mara van der Meulen
Have you ever tried to get an 8-year-old child to sit completely still for at least 50 minutes? And have you ever tried to do so when that child was a bit nervous? This was exactly the situation that our young participants were in when they visited the MRI scanner for a scan session in the L-CID study. During lab visits, we collected functional MRI data (up to six runs), structural MRI data, DTI data (two scans) and resting state fMRI data, resulting in a scan protocol that lasted at least 50 minutes per child. In this blog I’ll share some of our tips & tricks on how we approached this.
Make participant well-being a priority
Even before our first scan we realized that participant well-being was the top priority in the L-CID study: even though we wanted to collect large amounts of data, we wanted to make sure that all participants enjoyed being a part of the L-CID study. We therefore designed our lab visit in a way that allowed for plenty of time for chit-chat between tasks, for toilet or other breaks, and to answer questions if necessary. Especially for MRI data we knew that anxious or nervous participants would be less likely to lie still (and therefore have lower quality MRI data), which was an extra motivation to prioritize participant happiness throughout the study.
Preparation is key
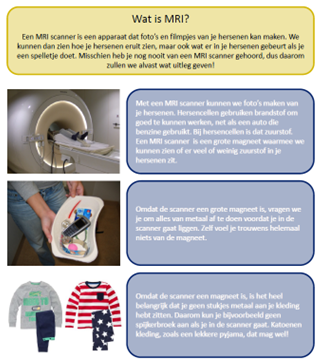
For us, this started with having our participants informed about what was going to happen, even before they arrived at the MRI scanner. Therefore, we already gave a brief explanation of the MRI procedure when we first contacted the parents. To show their children what the lab visit would look like, we also sent the parents some information via e-mail, such as pictures of the scanner environment and the different steps in the scan procedure.
This approach seemed to pay off: when the children arrived for the lab visit they always knew that an MRI scan was part of the visit, and they usually knew some aspects of the procedure as well (having to keep still, playing a game). We tried to make all participants feel welcome and at ease by chatting a bit about their plans for the day, their pets, or other small-talk.
Practice makes perfect
We started the lab visit with some general explanation and a practice session. We asked the participants and their parents to indicate how excited and how nervous they felt about the MRI procedure. Next, we invited participants to do a run-through of the procedure in a mock scanner. If they felt very nervous about that, we first demonstrated the procedure on a large stuffed animal while asking the children to assist us by handing us earplugs and other materials. Children who felt more at ease could practice lying on the scanner bed, wearing the ear plugs, and being shoved in the MRI scanner. We made our instruction as engaging as possible by asking participants what they were thinking (“Why do you think you need a mirror when you are in the scanner?”).
Check-in before the scan session
After the practice session the children were shown the real MRI scanner. After a change of clothes (we provided child-sized, metal free pajamas instead of hospital scrubs, for children who didn’t bring suitable clothes) and a toilet break, we again checked how children and parents reported on the child’s excitement and nerves towards the scanner. If children were still very nervous, we always addressed their anxiety and checked numerous times whether they felt okay about starting with the MRI scan. If they were too anxious, we explained that the MRI session was not mandatory and that they could also complete the tasks on the laptop. For those participants who were very nervous yet still willing to give the whole MRI session a try, we sometimes asked one of our dedicated research assistants to sit with them in the MRI room, so the child knew someone was with them.
Keep your participants’ preferences in mind
During the scan session we always kept a close eye on our participants, to ensure their wellbeing. Whereas adolescent or adult participants can easily lie still for 20 minutes or more, we found that our young participants liked to chat with us every couple of minutes. Therefore we organized our scanning protocol in such a way that every scan lasted a maximum of 6 minutes, followed by a short break that allowed us to check in with our participants again. This set-up gave them time to ask their questions, and it gave us the possibility to remind them to keep very still during the scan. To make the experience as enjoyable as possible, we also selected some age-appropriate movies (such as Frozen, Lilo & Stitch or Cars) for our participants to watch during the structural scans.
Adapt your procedure when necessary
Despite our constant instructions and encouragements to keep as still as possible, we quickly noted that this was easier for some participants than it was for others. After each completed scan we quickly checked for gross motion artifacts. In case of extreme motion during the structural T1 scans we often tried to redo the scan, hoping to get a more usable scan. However, when we noted that a participant was already anxious or stressed, or simply had a very hard time keeping still, we usually decided against redoing the scan: since we didn’t think a better scan could be made, we didn’t want to subject the participants to unnecessary time in the scanner.
If you would like to know how our approach affected the quantity and quality of the scans we collected, read our publication on scan quality and quantity. More details on our lab visits, including exact instructions, can also be found in our open protocols on data collection. If you have questions about anything we did, feel free to reach out!
Contact
Erasmus University Rotterdam
Mandeville Building T13
Burgemeester Oudlaan 50
3062 PA Rotterdam, the Netherlands


